Overview
The Stormbag Door Protection Kit is designed to provide fast, effective flood protection for garage doors, front doors, and patio doors. Whether you are preparing for an incoming storm or setting this up in advance, the installation process is straightforward and can be completed by one person in about 20 minutes.
The setup process is the same across all four available kits:
- Single-wide garage door kit
- Double-wide garage door kit
- Single door kit (standard front door)
- Double door kit (French doors or sliding glass doors)
Each kit includes plastic sheeting, duct tape, and Stormbags. The only difference between kits is the size of the plastic sheet and the number of Stormbags included.
Preparation & Unboxing
Make sure the area is free of debris so the plastic can seal properly and the Stormbags can sit flush against the wall.
Inside the box, you will find:
- A large sheet of plastic sized for your specific door kit
- A roll of duct tape
- A box cutter (used to trim excess plastic if needed)
- A supply of Stormbags
- An informational flyer covering Stormbag use and disposal
Set all materials aside so they are easily accessible. If your door is taller than you can comfortably reach, have a ladder ready. While having a second person can help, this installation can be completed solo.

Step 1: Hydrating the Stormbags
The first step is activating the Stormbags by hydrating them. Each Stormbag starts flat and lightweight and expands to approximately 35 pounds once fully hydrated.
How to Hydrate the Bags
- Place Stormbags into a container such as a box, wheelbarrow, large bucket, or similar vessel.
- Add enough water to fully submerge the bags.
- Allow the bags to soak for approximately 3 minutes.
You do not need to hydrate the bags one at a time. Multiple Stormbags can be soaked simultaneously to save time. As they absorb water, they will expand and become heavier.
Once hydrated, set the bags aside near the base of the door you are protecting.

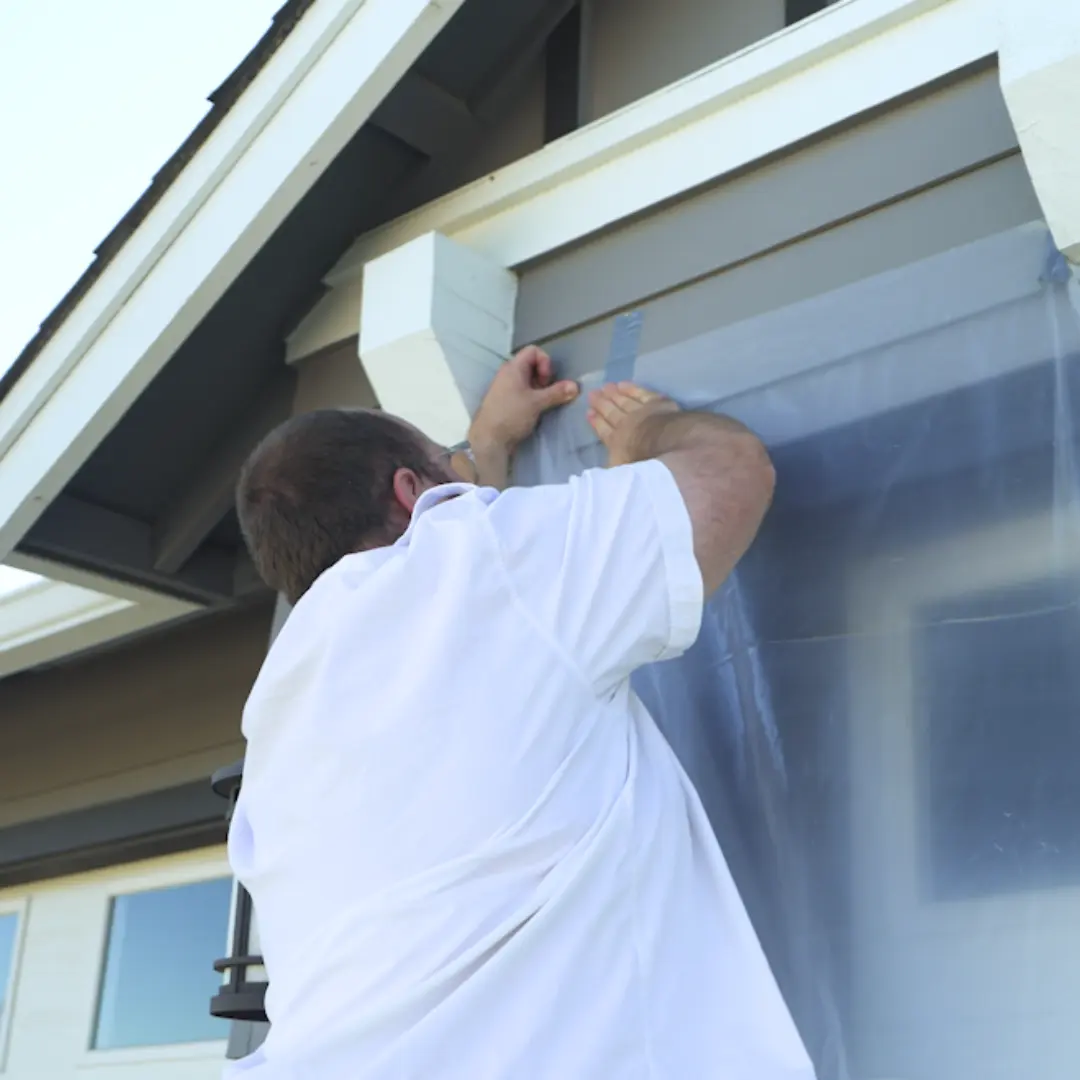
Step 2: Positioning the Plastic Sheet
After the Stormbags are hydrated, prepare the plastic barrier. The plastic sheet included in your kit is sized to fully cover the width and height of your door opening.
Installing the Plastic
- Unfold the plastic sheet completely.
- Position it over the door so it extends beyond the top and sides of the door frame.
- Use a ladder if needed to reach the top edge.
Pro Tip: Start by taping the top corners first. This holds the plastic in place and makes it easier to adjust before fully sealing the edges.
At this stage, the goal is to roughly position the plastic so it sits flat and centered over the door.
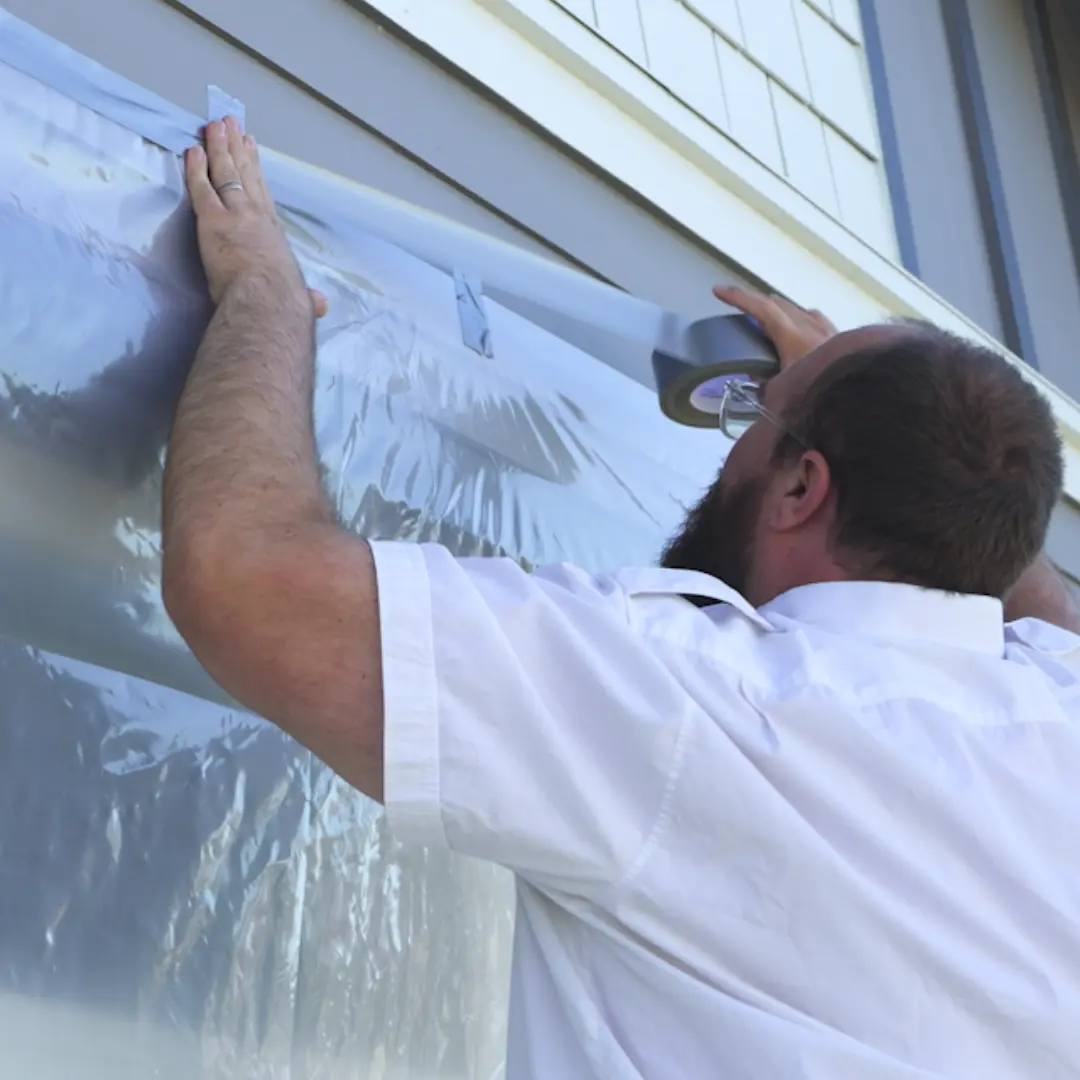
Step 3: Sealing the Edges with Tape
Once the plastic is positioned, it’s time to create a watertight seal.
Taping for a Proper Seal
- Use duct tape to secure the plastic along the top edge of the door frame.
- Continue taping down both sides of the door, pressing firmly to ensure adhesion.
- If your exterior has overlapping siding or textured surfaces, press the tape firmly into corners and seams for the best seal.
Work methodically from top to bottom, ensuring there are no gaps where water could slip through. The plastic should be tight, smooth, and fully secured around the perimeter of the door.
This seal is critical—the plastic prevents water from entering through the sides and top of the door.
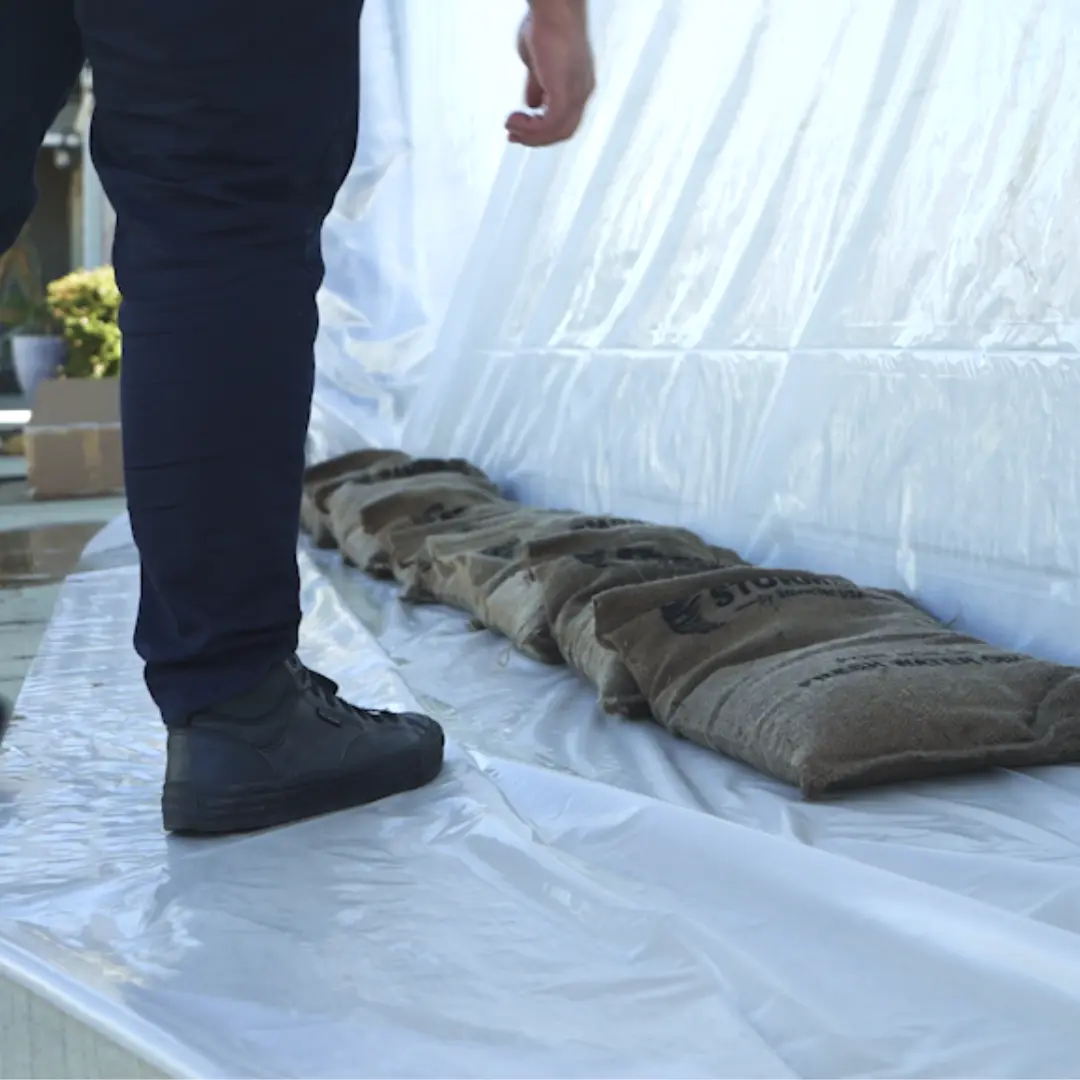
Step 4: Placing the Stormbags at the Base
The final and most important step is reinforcing the bottom of the door, where floodwater is most likely to enter.
Stacking the Stormbags
- Place the hydrated Stormbags directly on top of the plastic at the base of the door.
- Push the bags tightly against the wall or door threshold.
- Stack the bags in an overlapping pattern, similar to traditional sandbags.
- Continue stacking across the entire width of the door.
The weight of the Stormbags helps lock the plastic in place and creates a solid barrier against rising water.
Final Check & Results
Once all steps are complete, you should have:
- Plastic fully sealed along the top and sides of the door
- Stormbags tightly stacked along the bottom edge
This setup creates a strong barrier that prevents floodwater from entering your garage or home.
With the Stormbag Door Protection Kit properly installed, you can significantly reduce the risk of flood damage and protect one of the most vulnerable entry points in your home.
Our latest content
Check out what's new in our company !